Carborundum Collagraph
Workshop with Trish Meyer


Carborundum Collagraph: Texture & Image
June 29 – July 3, 2020
Limited to 8 students – 6 spots left
Learn to create painterly and photo carborundum collagraphs in this innovate workshop
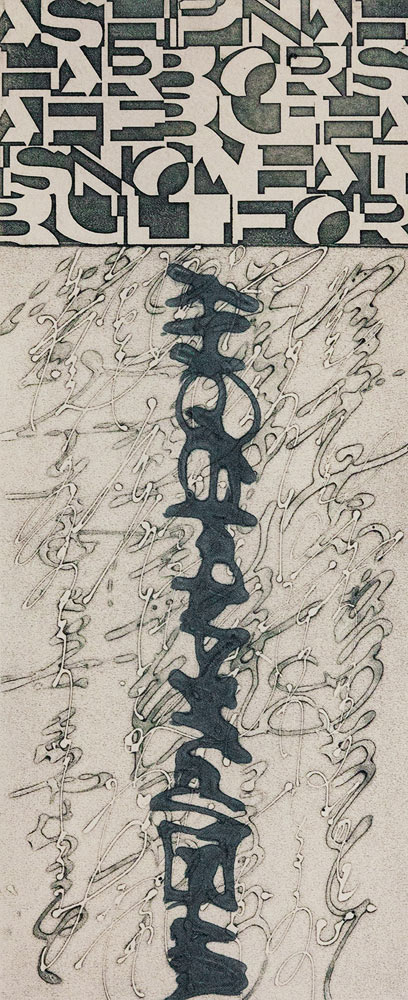
Texture
The class will begin with an exploration of various methods of creating expressive, painterly prints. With an understanding of how various acrylic gels and pastes ink up, you’ll know how to plan the “values” in your print. Unlike collagraphs created with mat board and collaged elements, carborundum collagraphs produce a final plate that is very durable and that doesn’t require sealing.
We’ll use Akua’s Carborundum Gel and fine carborundum grit – both of which can be used with stencils – and practice methods that produce random textural qualities as well as thin calligraphic lines. Smooth and textured plates will be provided, allowing for more creative possibilities.
These painterly methods use plate-making materials that are easy to find and inexpensive. Plates can be created quickly and can be printed just hours later.
Image
You’ll then build on this foundation by creating carborundum collagraph prints from images. You can either use digital images or you can draw on polyester film.
This technique uses a light-sensitive film adhered to screen printing mesh (often referred to as “EZ film”). The film is exposed to a positive transparency in a light exposure unit and any unexposed film is washed out with water. To make the plate, Akua’s Carborundum Gel is pushed through the holes in the exposed mesh onto clear acrylic (this is akin to screen printing with thick paint but without the frame). Plates are inked up with Akua Intaglio ink and printed on an etching press on dampened paper.
You can see this process in action in Akua’s video Introducing Akua Carborundum Gel for Printmaking (focus on the section titled “Making the Plate,” which starts at 1:50).
Photo stencils like the one used in Akua’s video can be purchased ready-made but they are expensive, and that can cramp your style if you like to experiment! In this class, you’ll learn how to create your own stencils at a fraction of the price.
Images that work best with this process are black-and-white line art, graphical designs, and high-contrast photos and silhouettes such as those created with the iOS app Inkwork. Using this technique, you can easily convert flat graphical images into interesting textured prints and you can further edit your plates with the addition of drypoint lines and painterly marks. Photographic collagraphs rely on a combination of techniques and materials, but none of the steps are difficult and the drying time for each step is fast.
All these collagraph plates also combine well with intaglio techniques for multiple plate printmaking.
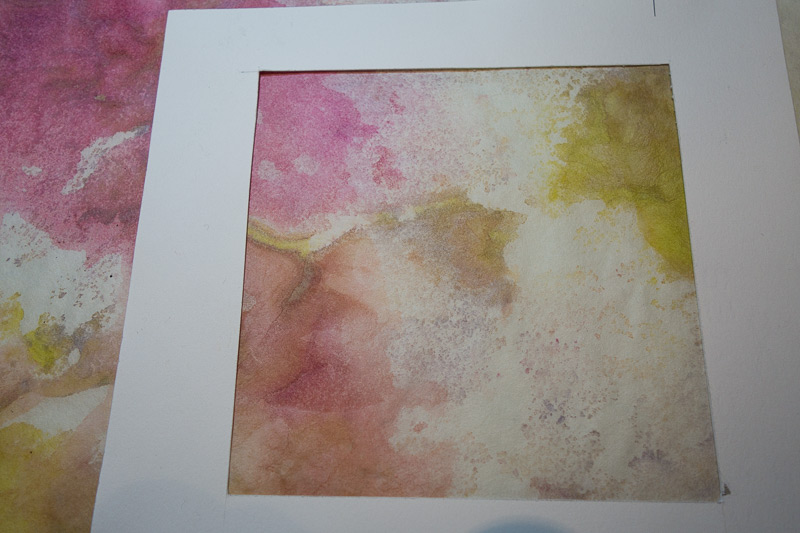
Splash Ink for Chine Collé
As a bonus tutorial, you’ll also learn how to create custom paper using a technique called splash ink. This uses mulberry paper with watermedia to create sheets of colorful paper that can be used for Chine collé backgrounds for your high-contrast collagraph prints.
Your instructor, Trish Meyer, is an experimental artist, printmaker, and calligrapher with a background in graphic design. A native of Dublin, Ireland, Trish enjoyed a variety of creative careers, from musician to motion graphics designer and author, before falling under the printmaking spell. Visit her website at trishmeyer.com.
What’s Included
Each participant will receive an instruction booklet covering each technique in detail, with a supply list for all the techniques discussed. (Instructions for sizing digital images will be emailed to students in advance.)
The course includes enough acrylic materials, Carborundum Gel, plates, transparency film, and photo-sensitive film to create eight plates per student with a print size of 11 x 15 inches (quarter sheet).
Also included is Asian paper and watermedia for creating splash ink paper, and additional ink and paper along with other communal materials and tools (such as knives and scissors).
See “What to Bring” for additional suggestions of materials.
What to Bring
The following is a list of additional items for carborundum collagraphs you may want to bring:
- Digital images on a thumb drive, laptop, or smartphone (instructions for sizing will be emailed to students in advance)
- Ideas for source materials such as your drawings and photographs
- Drawing tools (assorted pencils, erasers)
- A notebook and pen
- Stencils (acrylic, not paper)
- Mylar to create stencils (optional)
- Brushes for acrylic material – a variety of sizes to suit your working style (note: the studio has some communal brushes)
- Apron
- If you have a favorite color palette, you may wish to bring watercolor (liquid or tube) or acrylic ink for creating splash ink paper; note that transparent colors such as Quinacridones work better than opaque earth colors
- Large enough luggage to pack small and medium prints, and stiff protector such as cardboard or a mat board (prints from this class will be 11 × 15 inches, which should fit airline size restrictions)
Note your “general studio fee” covers an extensive array of relevant shop needs including ink, ink knives, modifiers, cleaning supplies, paper towels and rags, tarlatan, newsprint, mat knives, aprons, some drawing acetates, India ink, and other communal creative print shop materials.
The general studio fee does not cover printing paper other than that listed in the “What’s Included” section or any other noncommunal printing supplies.
That’s it! Any questions about supplies, please feel free to contact us.
Workshop Itinerary
- Monday morning begins with students arriving at the studio between 9:30-10 AM.
- Daily instruction is 10 AM to 4 PM with the studio open to students between 9:30 AM and 7 PM. Exception is Friday when the workshop ends at 4 PM.
- Bring a lunch everyday except Tuesday when we go out Dutch for a late lunch
- Thursday night we host a dinner in our courtyard. Companion welcome.